Reshared post from +Claire Blackshaw
Programming Rabbit Hole
Perfectly explains the feeling when fixing a problem in code.
Found on Twitter
Reshared post from +Claire Blackshaw
Programming Rabbit Hole
Perfectly explains the feeling when fixing a problem in code.
Found on Twitter
Reshared post from +The Weather Channel
Interior Alaska Warmer than Midwest
A portion of interior Alaska (including Fairbanks) is warmer than the majority of the Midwest this morning.
#akwx
I love Freecycle. I picked up a tent a couple of years back, and finally pitched it this weekend. I was told it was broken when I picked it up, so that’s why I’ve waited so long to pitch it. I needed an excuse to want to mess with it.
The excuse is that I am dog-sitting my parents dog right now, and this tent is a ‘dog friendly’ style.
The elastic shock cords that hold the tent poles together are completely shot. I’d guess that this means the tent is quite old or was stored in a hot place maybe?
The tent is otherwise like new. I bent the light weight stakes putting them into my recently rain-softened ground than they were already. There isn’t any dirt on or in the tent. A lot of the sewn loops look like they have never been used. I think the tent was pitched once, packed up, and never used!


I am going to make a ring with the tent pole pin and install it to the loop that lacks that device. The poles are going to get spray painted a different color for each pole so I can sort the pieces of poles easily.
I’m going to hose the tent down and see how water proof it is.
Once fixed up, this may become my main tent while the kids are little because that built in play tunnel is just so darn fun!
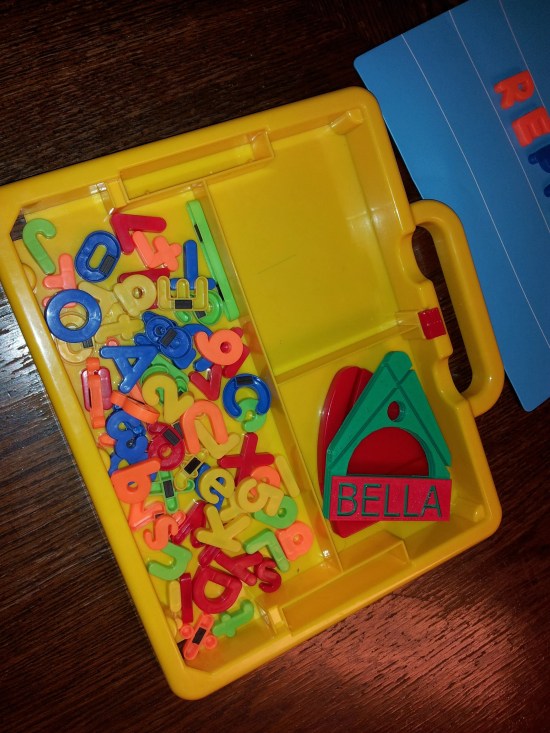
I got a text today saying Bella needed a part for one of her toys printed.
This got me pretty excited. My 3 year old is developing problem solving skills. It’s not that Dad will fix it, but what tools he will use too.

So we decided to make a new part for her toy. I suspect that the missing piece is somewhere in her toybox, but I just HAD to reinforce to that adorable little girl that she can make stuff herself.
We sat down in front of the computer with the part she had and a ruler and a tape-measure and a calipers and drew the part in Sketchup.

It took a little while, but we got it all measured and drawn. The new part is ambidextrous.

Once we where happy with the model, we customized it. We added her name and some shapes. I did this as I am low on plastic and was afraid that it wouldn’t print due to running out. Knocking out areas uses less plastic. Also, it let her customize the part.

I sliced and loaded the file, pre-heated the printer, and let her push ‘Print’.

The printer is so much fun for both of us to watch.

She was quite excited when the printer started to print her name. She can’t read yet, but she does recognize letters.

This was my first filament hot-swap. It took me about 4 tries before I was happy with the transition. Only about 6 inches left on the green by that time. I think the effect turned out well.

Who makes toys with soo many pieces to loose? Oh well. I am going to need to buy a box of small magnets so I can print more letters in the near future.


I think this was a good father-daughter building and bonding experience.
People keep saying 3d printers will revolutionize the world. They are right, just not in the HOW. The children growing up with desktop manufacturing available to them are the ones that will revolutionize the world. The ability to create without the prerequisite traditionally required craftsmanship is what will do it.
Look at the underlying shift in base assumption of my 3 year old, it's not *if* I can fix her toy – that's a given in her mind, it's that it's as simple as pressing a 'print' button on a computer.
That's what blows my mind.