Front view of the book case with all the shelves installed. It is pretty sturdy. I can grab the top shelf and pick myself off the ground. I think that a small child or a cat could climb this shelf without risk of it falling over it is so deep. It wants to wiggle though. It is very stiff front to back and side to side, but it will twist a little bit if you walk into the corner. It is actually kinda funny, it acts like it is ticklish. I don’t think it will twist itself apart. Having 2 frames with longer shelves, like what I saw at the store, there wouldn’t be any worry about the twist.
Looking at the shelving from the back corner.
I had originally thought to use the shelves like this, but when I waled around it and about poked an eye out on a corner, I changed my mind.
Hey, it looks pretty good sitting there. I used to have my gray tub of bedclothes, my firesafe film vault, and a large box of food sitting where the shelf is now at.
I need to sand and paint the frame. I will do that when I move I guess. I think my electric sander is in a box in a friend’s garage. I am going to caulk the seems with paintable caulk so I don’t have any obvious joints when it’s all done. I think it will look nice.
Final Assembly of shelving.
Attaching the hinges to the frames. I attached them with the frame opened up so I have a better chance of getting them straight.
I put the hinges on just below the height of the shelves so they would be less visible.
Cool, eh? It folds up for easy transport. I can flop this on my roof rack on my car and carry it to my new place when I move.
It’s not many 6 shelf, 7 foot tall, 36 inch wide, 16 inch deep shelves that you can carry into a room through a door by yourself with one hand.
Cutting the 2nd set of tenons on my table saw.
OK, so I got lazy. I wasn’t happy with the depth not being quite right with my tenons when I did them by hand. I have this new table saw sitting right inside my front door, I just as well use it, right? I cut the tenons using the miter guage and the rip fence. The Rip fence was set to the depth of the tenon, and the blade was set for what needed to be cut off as far is thickness. I then put the cross member against the miter guage, and cut the tenon about 10 times each side. I just move the board away from the fence an eight of an inch each cut.
These are all much more consistant in size now. I used my chisel to clean up any rough spots or little thin pieces of wood I missed with the saw.
I cut all the tenons tonight, glued, and rope-clamped the 2nd half of the shelving support tonight.
Here are the two halves leaning against each other. Doesn’t look like a bookshelf does it. This 2nd unit has twist in it too, the opposite direction of the one I glued up last night. So it is sitting out to dry blocked up to flex it the other way. I hope they come out square with each other.
Using rope as a clamp for my shelving
I have the assembly all glued up. Now to clamp it. Normally half a dozen pipe clamps would be in order, but I don’t own a single one. (gift idea, wink wink, nudge nudge)
So for my latest rope trick, I am going to make some shelf clamps. A bowline, a truckers hitch, and tie the rope off. Simple, right?
The second cross member gets cinched tight. I tied the rope to the top, tied a loop below the not. The rope goes down and under, and back to the loop. I feed the rope through the loop, and then pull down as hard as I can at the awkward angle and trying not to get any glue on me. When doing this, the loop in the rope acts like a pulley, and you can get the rope pulled tighter. I call it a truckers hitch because I have seen old truck drivers use it to tie down loads in their pickup trucks.
I finished tying up each cross member as tight as I can make it. If you noticed, I tied 2 ropes in the same empty space, skipped a space, did 2 knots , skipped a space, did the last 2.
I came back and tied the 2 ropes in a space together as tight as I could. This really cinched the tenon and mortise joints together.
Here you can see my rope-work. Used up most of my rope doing this.
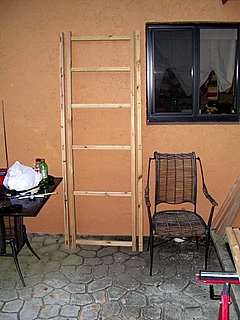
I blocked each corner and laid the bookcase frame down on the ground. I then measured for square. It is an eight of an inch off. I think I can live with that.
The top left corner was wanting to lift up off the ground. The frame isn’t laying flat. So I removed the block under that corner and weighted it down. I am hoping that when everything dries up, it will come back halfway between where it currently is, and where it wanted to be, making a nice, flat shelving support.
I spoke with my dad about my do it yourself book shelf tonight. I had decided that I am going to cut the rest of the cross members with the table saw, and wanted to ask the best way to do it. He recommended using painters caulk to fill in the gaps in my joint work so the finished, painted shelving looks really good.
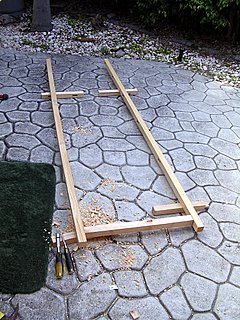
Assembling one of my shelving upright.
 The first cross piece gets fitted into the uprights. It works! Being that I am working on the ground and not on a workbench, that I am inexperienced with this type of woodworking, and so on, and so forth, my mortise and tenon cuts aren’t perfect. When fitting the cross pieces to the uprights, I would flip and turn the cross members to try to find the best fit for edge alignment. Some of the mortises cut a little tweaking and most of the tenons got trimmed with the chisel.
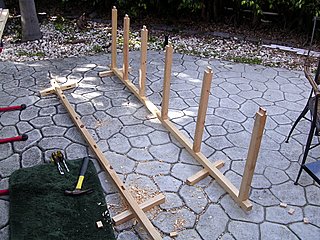
 It kinda looks like a railing here, doesn’t it? It is kinda challenging to get everything all lined up by myself. but I started at one end and worked back and forth until everything slipped together. Now I just need to take it all apart so I can glue it up.
 This is as far as I got today. I got one of the 2 halves assembled, and the mortises cut into the the remaining 2 uprights. I figure it will take most of the evening tomorrow to disassemble and glue, and reassemble the completed half. I am going to use a rope as a clamp to make the joints tight. I am also going to need to counter-twist this half as one corner wants to lift about an inch away from flat.
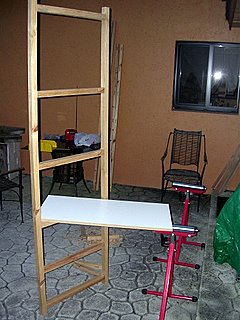
 I wanted to see what it looked like with a shelf in it. The assembly is actually upside down of how I am going to use it, but it lined up to my roller-stand better this way. I also have the finished end of the shelf facing away from me in the picture. Even though it is going to have some massive shelves, it should be fairly “light” to the eye.

