Sing with me!
Good thing my carpentry is better than my singing.
Today I didn’t get around to any blacksmithing, but I think I have a pretty good excuse!

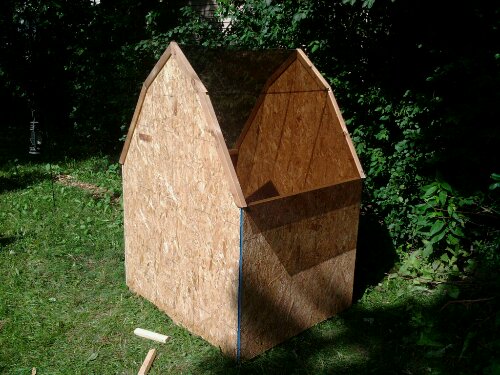
My pallet started looking like a barn today.

I kicked around the plexi roof and after a bit of trial fitting, decided it would work quite well. I started by cutting the lower sections of the roof and worked out a frame to hold them. The fame has a slot to hold the plexi. Once painted, I will silicone the plexi into the frame to keep it from popping out. The frame is also notched to fit over the sides. This will help keep the wood dry so it won’t disintegrate in the weather.


I figured out how I am going to do the door. I will make a slider door. Well, two actually, as I am going to split the door so it’s more symetrical. I will put two metal rails on the toy barn, and 2 hoops per door to hook over the rails. Think shower curtain.
I actually broke down and spent money on this project. I bought 2 gallons of barn paint for $15 each. One red, one white.


The neighbor brought over a bit of carpet. How plush! A carpeted play house.


- View from inside the play barn through the ‘glass’ roof
So the things left to do:
- Create a ridge to stop the plexi roof from sagging
- Paint the interior
- lay carpet
- make a bench/work table along the back wall
- make the door
- make the door slide rails
- trim the outside
- paint the outside trim
- maybe make some blacksmithed corner brackets for looks
- make a wood shed on each side – this will ‘squat’ the barn visually so it’s not so tall looking.
- make a silo – it would hold the coal for blacksmithing.
- make a mini fenced area for the pretend farm animals.


