I missed a week, again! Sorry about that.

My dad had found this mirror at a garage sale. We put some short legs under it, and it’s one of her more-favorite toys!
Photo taken by http://facebook.com/isiahxiongphotography..
I missed a week, again! Sorry about that.

My dad had found this mirror at a garage sale. We put some short legs under it, and it’s one of her more-favorite toys!
Photo taken by http://facebook.com/isiahxiongphotography..
Sing with me!
Good thing my carpentry is better than my singing.
Today I didn’t get around to any blacksmithing, but I think I have a pretty good excuse!

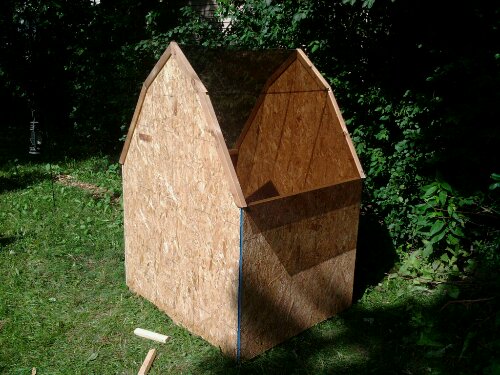
My pallet started looking like a barn today.

I kicked around the plexi roof and after a bit of trial fitting, decided it would work quite well. I started by cutting the lower sections of the roof and worked out a frame to hold them. The fame has a slot to hold the plexi. Once painted, I will silicone the plexi into the frame to keep it from popping out. The frame is also notched to fit over the sides. This will help keep the wood dry so it won’t disintegrate in the weather.


I figured out how I am going to do the door. I will make a slider door. Well, two actually, as I am going to split the door so it’s more symetrical. I will put two metal rails on the toy barn, and 2 hoops per door to hook over the rails. Think shower curtain.
I actually broke down and spent money on this project. I bought 2 gallons of barn paint for $15 each. One red, one white.


The neighbor brought over a bit of carpet. How plush! A carpeted play house.


So the things left to do:

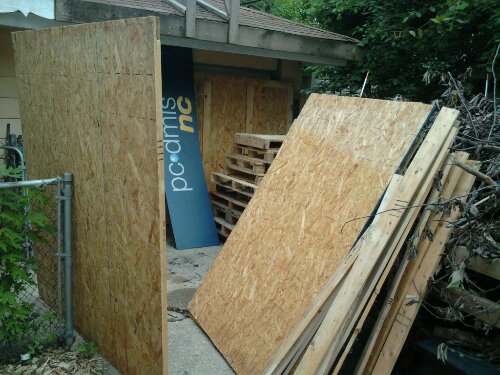
I was offered a bunch of wood at work, pallets and a shipping crate. Once I got them home, I got to looking at that shipping crate and thought that I should make something useful out of it.
Like a play house for Bella.
So I started planning one. Rolling the idea around in my head. I came up with a really fancy idea of a little house, porch, shed, etc. Then I decided I wanted to make all the hardware with my blacksmithing skills. It kinda went overkill in my head. Then I decided that a barn would look really cool with hand made hardware. So, a barn shaped object is now the plan. Water and Ice for the roof, maybe a few shingles from the bundle I found in the garage. A sky-light so I can see in and check on the trouble brewing in the play barn.
Well, not really the plan, as there are no plans. Just cut wood until the pieces fit together nicely. I picked the nicest pallet – a solid red oak one it turns out – and tossed it on the ground. That’s how big my barn will be.
I measured the pallet, and the broken down bits of shipping crate. I grabbed a piece of soap stone and drew out a ‘barn’ shape on a sheet of wood. Katie liked it except it was too tall. So, adjusting it down, I laid two pieces down on a saw horse and measured out my barn sides.

A few minutes with a circular saw and I had my two ends! I screwed them to the pallet. I scrounged a few 1-bys to hold the two end walls apart. I cut another sheet down to the side walls. I screwed them on, and it’s looking pretty good, if I say so myself.

I got to looking at the roof, and I think I am going to make the whole roof out of some dark smoke colored Plexiglas I have. Water proof & easy to see inside.

So, the front end is to come off, and the door cut. Some small windows cut into the sides. The floor needs to be put in and maybe a small sit/work bench along the back wall.

I am contemplating a working hay-mound door with a pulley to a pull cord across the top of the inside of the barn. Hinged door main door? Maybe a slider? 1 piece or two? All good questions. The answers will likely come after I cut out pieces and seeing how they fit together.
That’s just how I roll..
So here is the last photo in the first half of this series. Just look at those blue eyes!

If she’s not the cutest baby ever, she’s at least gotta be in the running. One would think such an adorable baby would make the photographer’s job easy, but you need some mad skillz to crawl around ahead of the baby, backwards, directing lights, reflectors, shade, and an unruly baby who got bored with the whole picture taking business about half an hour ago..
Tonight I made a sub irrigated planter. These are pots that hold water under the dirt and let the pot get watered from the bottom up. Supposedly this gives you better roots as they grow deep, towards the water as opposed to staying near the top.
I built mine using recycled ‘stuff’. The pot is a round plastic tote that was on the deck when we bought the house, so it’s a bit weather beaten, but still in good shape. The tray is part of the plastic back from a rear projection TV I am parting out for parts for other projects. The fill tube is a bit of PVC pipe. The wicking fabric is the only part I actually bought for this project.

I traced the bottom of the tub onto the black plastic, and made a larger circle around the tub circle to cut along. I then cut tabs up to the tub circle.

I used a heat gun to heat up the plastic and bend the tabs up. These will for the legs of the tray to hold the tray above the water.


I cut 4 slits a little wider then the saw blade of my jigsaw.

The fabric gets cut into strips and fed through the slits.

Make sure the fabric is long enough to extend all the way to the bottom of the tub. They need to be able to touch the bottom so they can wick up every last drop of water.

The tray gets dropped in feet first and tweaked to fit. This was just a tad to big, but I got it worked out to fit.

I then used a hole saw to cut a hole for the fill tube.

The bottom of the fill tube isn’t flat, it was cut by drilling may holes – this makes sure that water can flow out the bottom easily.


It’s important to have an over fill drain hole. You don’t want water to get up to the dirt level or you will drown your plant roots.

My edges where less than perfect, with a low spot, so I used pea gravel to add some drainage and make sure that the dirt stays above the water level.

Dry potting soil won’t wick water from what I’ve read, so make sure the dirt is moist.

I used most of a new bag of potting soil, and some old stuff that I had but never used. This is a large container, so I am hoping it’s big enough for more than one tomato plant.

The pot is to go on the deck. Tomatoes and basil. Hopefully they do well, right out the kitchen door.