A laminar flow pipe reducer for a pump housing. At least, a little bit of Google searching hasn't shown me another.
I am trying to find a cheaper way to heat the 75 gallon aquaponics system in the basement. It's really running closer to 125 gallons of water with a LOT of surface area. This bleeds heat quite quickly, so the electric submersion heaters are expensive to run and I simply don't have enough to keep up with the cold basement sucking the heat out of my tanks.
So, I did something stupid. I rigged up a water line to the furnace and water heater flue. This involved running about 25 feet of 1/4 inch tubing because that's all I had on hand that would go the distance. There are issues with copper being toxic to fish, and cooling the flue, causing Carbon Monoxide to fill the house. So this is not something you want to do yourself.
I needed more water flow. A 3/4 inch pond pump forced down to 1/4 hose just doesn't work very well. Too much restriction to get good flow.
I had to make a water tipper to help my grow bed siphon start and stop. This just fills up with water slowly and then dumps the water at once into the bed. The small water pulse surge is often enough to trigger a slow siphon.
This is fine and dandy, but I have a 3d printer. So I spent some time with a Fluid Dynamics textbook and openscad and came up with an adapter for running multiple hoses out of my pump – http://www.thingiverse.com/thing:54029
I think it's a first. I haven't found anybody else who made a laminar flow reducer for a pond pump. This thing induces laminar water flow through a series of small honeycomb shaped features inside the adapter.
It was very challenging for me to make, as my math skills aren't up to par. I kinda had to trial and error it instead of solving the problem with math.
In the end, it's designed to be printed, with a center support column running up the center to make the upper section easy to print.
The best part is that the goofy thing works!. I get the same water flow out of the heater line as before PLUS I get 2 additional water lines that are providing a significant additional water flow. I'd expect it to work poorly do to all the plastic that's in the water flow, but it seems to be efficient enough to overcome all the extra gunk in the way.
I didn’t realize it until last night, but 1 of my windows wouldn’t lock. I can’t have that! It was a 2nd story window, so not a security issue, but the cold air blows through it. I needed to make a shim for the lock.
I happen to have this really cool tool. My 3d printer. It can make parts for me when the weather is too nasty to go to the store (never mind that the stores don’t carry the parts I want).
Some quickly made plastic shims. They are 2 different sizes because the window wasn’t installed well it appears.
I took a few measurements, wrote a few lines of openscad code, and 30 minutes later, I had some perfectly fitting window lock plate shims.
3d printed window lock plate shims to hold the 2 halves of the lock at the right distance so they can function!
The most tedious part was getting good measurements and working the screws with the window right there. Doesn’t leave much room for tools and hands.
I installed the shim and now the lock engages perfectly and snugs up the window seal so less cold air blows through it.
The part is so trivial to create that I probably won’t post it to thingiverse… although the new configurator may make it useful for other people.
I am not a fan of cooling fans… I am thinking water cooling the hot end is pretty cool…
Watercooling my MakerGear Prusa RepRap I’ve been fighting with printing 1.75mm PLA. The thicker brass in the hot end causes the heat to creep up more and make the ‘melt zone’ so long and sticky that the printer jams up…
I’ve been fighting with printing 1.75mm PLA. The thicker brass in the hot end causes the heat to creep up more and make the ‘melt zone’ so long and sticky that the printer jams up. The normal ‘fix’ is to have a small fan blow up into the hot end insulator – the black plastic bit.
This sucks for me. The fans fail – stop spinning, fall apart, etc. The wires pop loose, touch each other, and short out the power mosfet on the RAMPS board. The fan falls down, hits the part, knocks it loose or causes the carriage to skip.
Fan blowing up, cooling the hot end insulator to prevent jamming (This is http://www.thingiverse.com/thing:13343 by the way, the best fan holder I’d found)
The irritating part is, the printer will eat 3mm PLA all day long without a problem without the need for this fan.
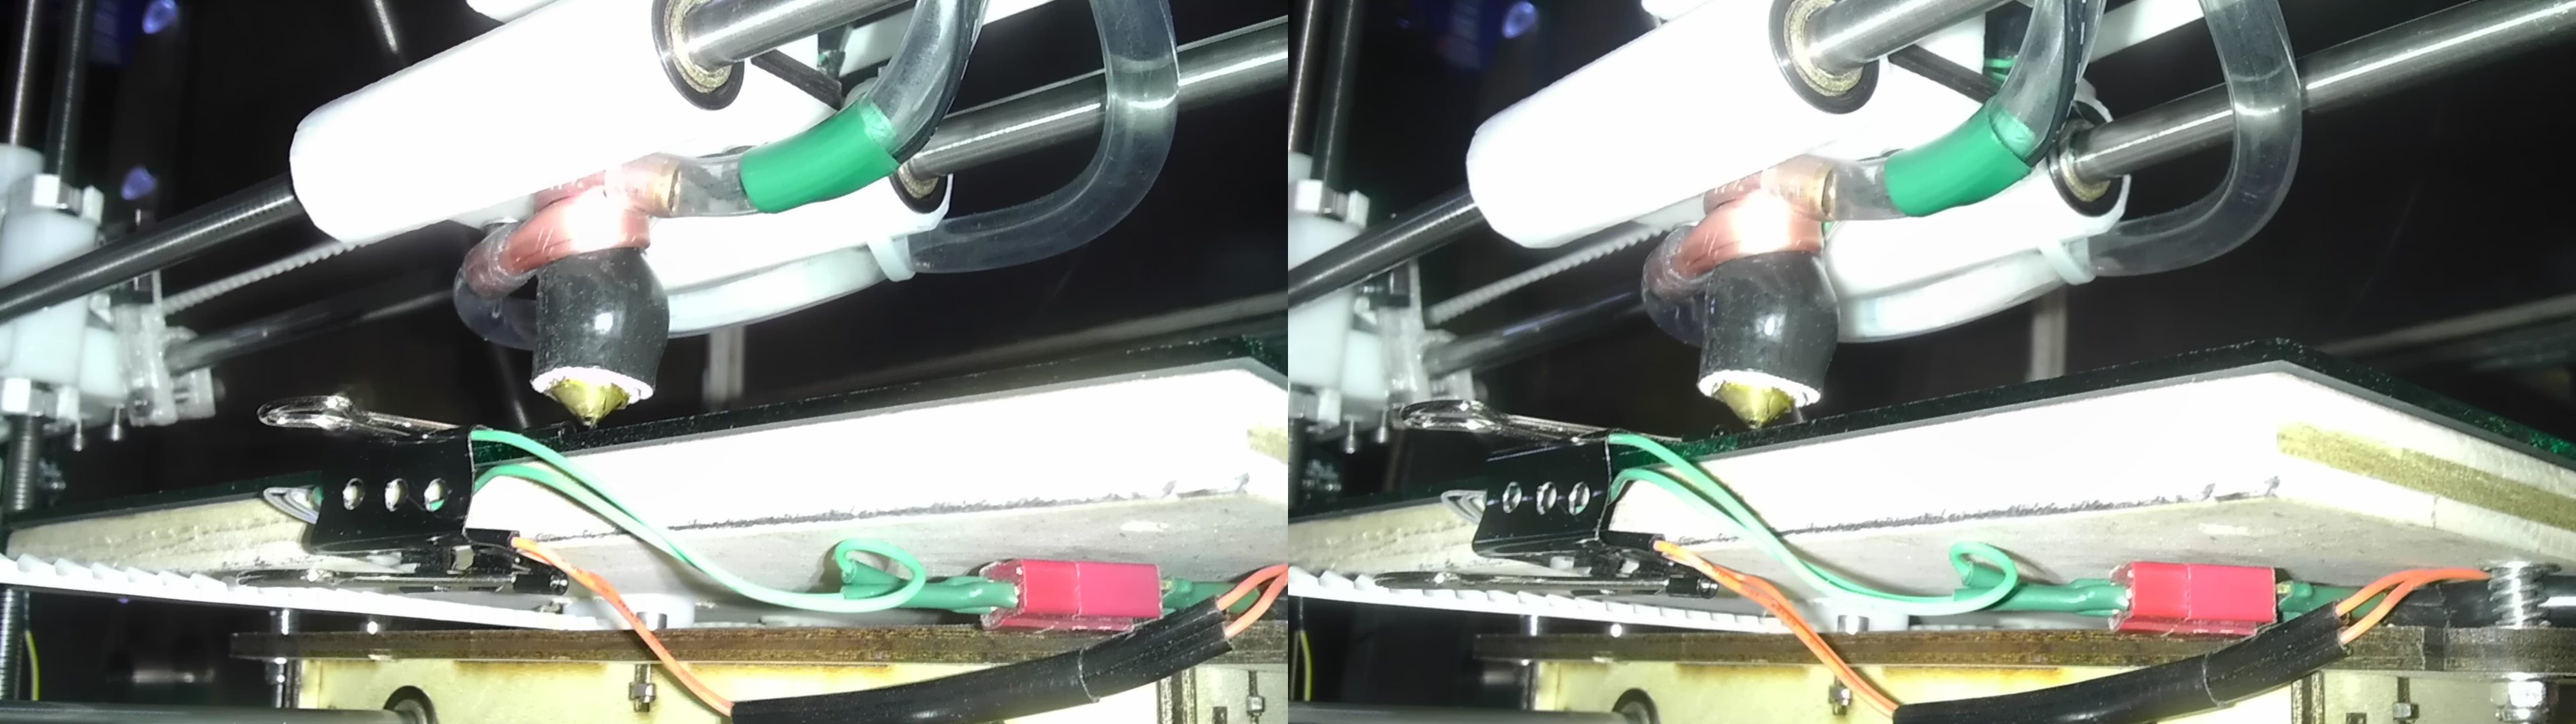
(Stereoscopic images, look at them cross-eyed if you want to see them in 3d)
The parts I got for water cooling my RepRap hot end. A bit of soft copper tubing and some hose.
I cut some tubing with a pipe cutter. I just kinda guessed how long it should be by wrapping my finger around the hot end and cutting the pipe at the length that seemed nice.I deburred the copper tubing with a countersink. The cutter gives me a nice outside edge to slip the tubing over. I wanted a clean inside edge for the water flow.I bent the tube over a screwdriver. I was going to fill the tube with sand so it didn’t kink, but I just started bending and it went around without kinking. I was also thinking of sliding some flat metal inside and hammering it down before it bent, but the bend just kinda happened successfully.I bent the tube around the hotend. I used the pliers to snug up the bend. It’s not really tight, and I wish I had some heat sink compound to help improve the contact between the two surfaces.The ‘wide’ side of the tubing wrap is taking up nearly all the space available along the hot end insulator.I measured out a bit of tubing, cut it off, and slid it onto the copper tubing.I think that the water cooled hot end looks pretty good.I slid a thermistor between the hot end and the water jacket so I can measure the effectiveness of the water cooling.
The task of installing all of this was almost challenging. There was just enough room to be able to slide the hot end up through the carriage, slip on the groove mount, and get it all positioned. The one bolt hole was kinda hiding above the copper tube, but the tube can be spun around a bit so everything can be bolted up snug.
Here is the water cooled hot end installed onto the X carriage. You are seeing most of it in the reflection of the mirrored print bed.Here we are looking up at the hot end water line routing. Also note the drilled holes in the binder clip. This takes a lot of the strength out of the clip so it’s less likely to break the glass or jump off the print bed and land on the far side of the room.Here is the water pump in the aquarium. Just straight fish-poo water. It’s not touching the printer, I am not worried about it. More concerned about the toxicity of the copper to the fish than the toxicity of the fish to the printer.Here is my RepRap 3D printer next to the aquarium that is cooling it. Or is this a photo of my aquarium with the overly expensive electric water heater that happens to print plastic parts? Hard telling…I ran the water and electric wire routing next to each other. The water and thermistor are not part of the ‘main’ wiring harness as I switch between 3mm and 1.75mm nozzles.Note the pretty hard bend in the plastic hose. If it’s less than this, it hits the mount for the X end stop.The water flow through the hot-end is pretty good using the tiny pump I have. I am not seeing a significant difference in temperature from the tank temp to the water from the hot end cooler.
The whole assembly was pretty quick and easy. When I installed the water cooling, I also incorporated the temperature monitoring and soldered the USB cable to the arduino board as the USB-B port got sloppy and would disconnect on me mid-print.
As for some numbers as to how well this works. With no water running through the copper tubing, I am seeing temperatures over 135f after 10 minutes. Yeah, Yeah, I know, RepRaps are metric, but it’s an easy value to convert, go too it. With water running, the top temp I’ve seen is 115f. It likes to run closer to 100-110f. My longest print so far is close to 4 hours without any problems. Without any cooling (and the copper not installed) I’d start to see jamming problems around 1 hour at .1mm layer height. .3mm layer heights would go much longer without problems. I am guessing that the plastic flow volume keeps pushing the heat down the barrel and doesn’t let the transition zone get too long.
I’ve not weighed the copper, tubing and water to see how much extra this weighs over the fan and mounting hardware.
I may run the water around the extruder, X and Y motors to help cool those. Not that they get hot really.
I think I want to mount some SMD LEDs against the tubing for some neat lighting effects. Just so it looks cool.
I've got intermittent failures that looks like a bad USB cable. On three different cables. One thing I've noticed is that there is a lot of wobble in the connector. I think 9 months of having the cable come around to the front of the printer has messed it up. Is there something I can do to fix this? Replace the port? Shim the side with a bit of paper?